At work we are working on a React Native version of an existing app. RevenueCat themselves provide useful information on how to test RevenueCat in the iOS simulator with one of their example projects, but as someone who isn’t very familiar with XCode I had to figure out a few steps on my own for the React Native project (using Expo) we are developing at work.
For this guide I am assuming you have an app in your App Store Connect account with some existing subscription products. You can find these by going to https://appstoreconnect.apple.com and going to Apps > Subscriptions in the sidebar. I am also assuming you are using Expo.
Testing RevenueCat with React Native and Expo on an iOS simulator
Setup and configuration
You need to configure both your app, the information in App Store Connect, and your RevenueCat dashboard for this to work.
- Update your bundle ID so that it matches the Bundle ID in your App Store Connect account. You can do this in your React Native app config file. For us, this is
app.config.tsin our React Native project. - If you have your simulator open, I recommend clearing the device by going to Device > Erase all content and settings.
- Delete your
ios/directory in your project - Create a new
ios/project by runningnpm run prebuild:cleanornpx expo prebuild --clean - Open XCode and choose “Open existing project” Then choose the
ios/directory you just generated. - Now we need to add a StoreKit test configuration file.
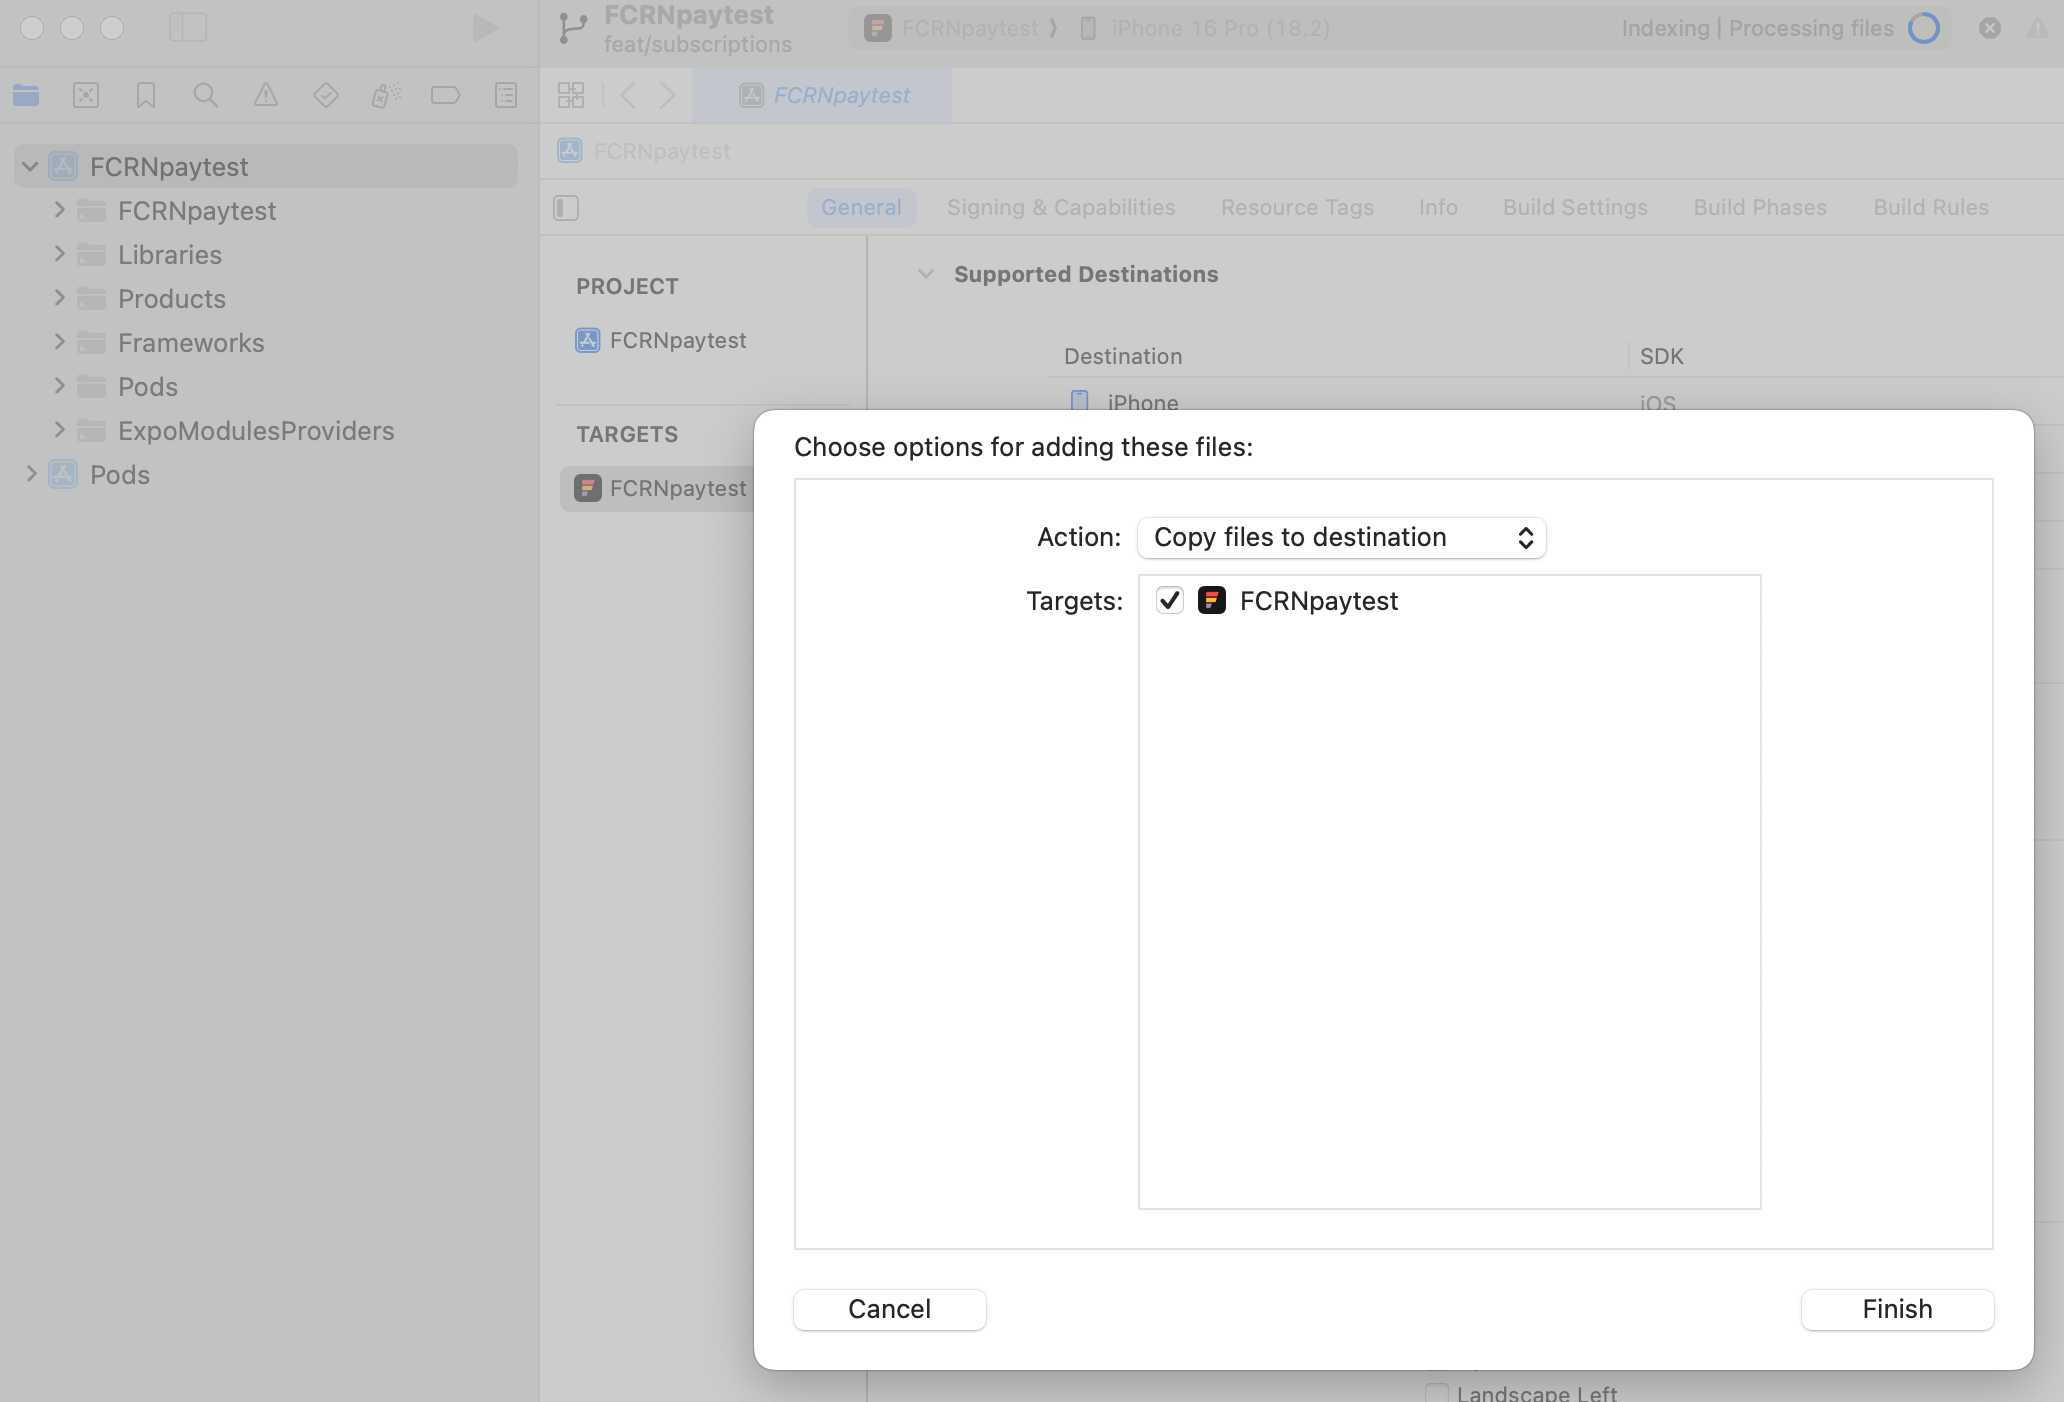
- If you have an existing StoreKit file, you can drag that into your project in XCode. You will get a prompt to select your target project where you need to make sure your project is selected.
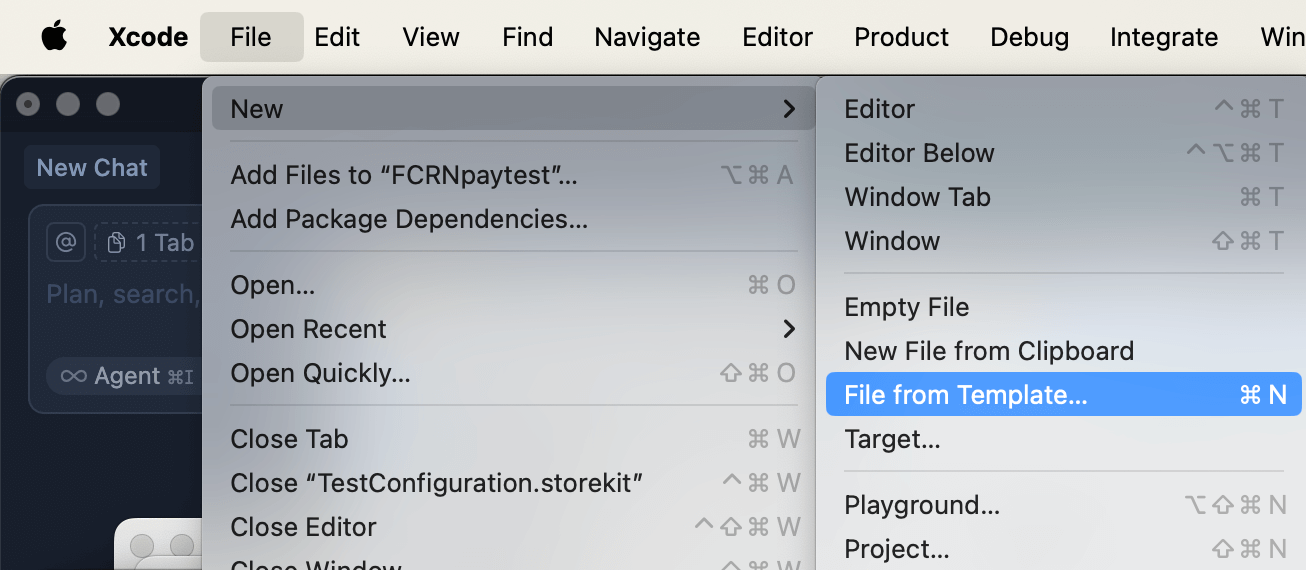
- If you do not have a StoreKit testing file, you can create one by choosing File > New > File from template, and then searching for “storekit” to create a new file. You can choose any name for the file.
- If you have an existing StoreKit file, you can drag that into your project in XCode. You will get a prompt to select your target project where you need to make sure your project is selected.
- If your StoreKit test configuration did not have products yet, you need to add them
- For this I will refer to RevenueCat’s video. You need to make sure your product IDs match the ones in your App Store Connect account. In RevenueCat these can be imported straight from your App Store Connect account.
- Add your StoreKit test configuration to your app’s scheme in XCode.
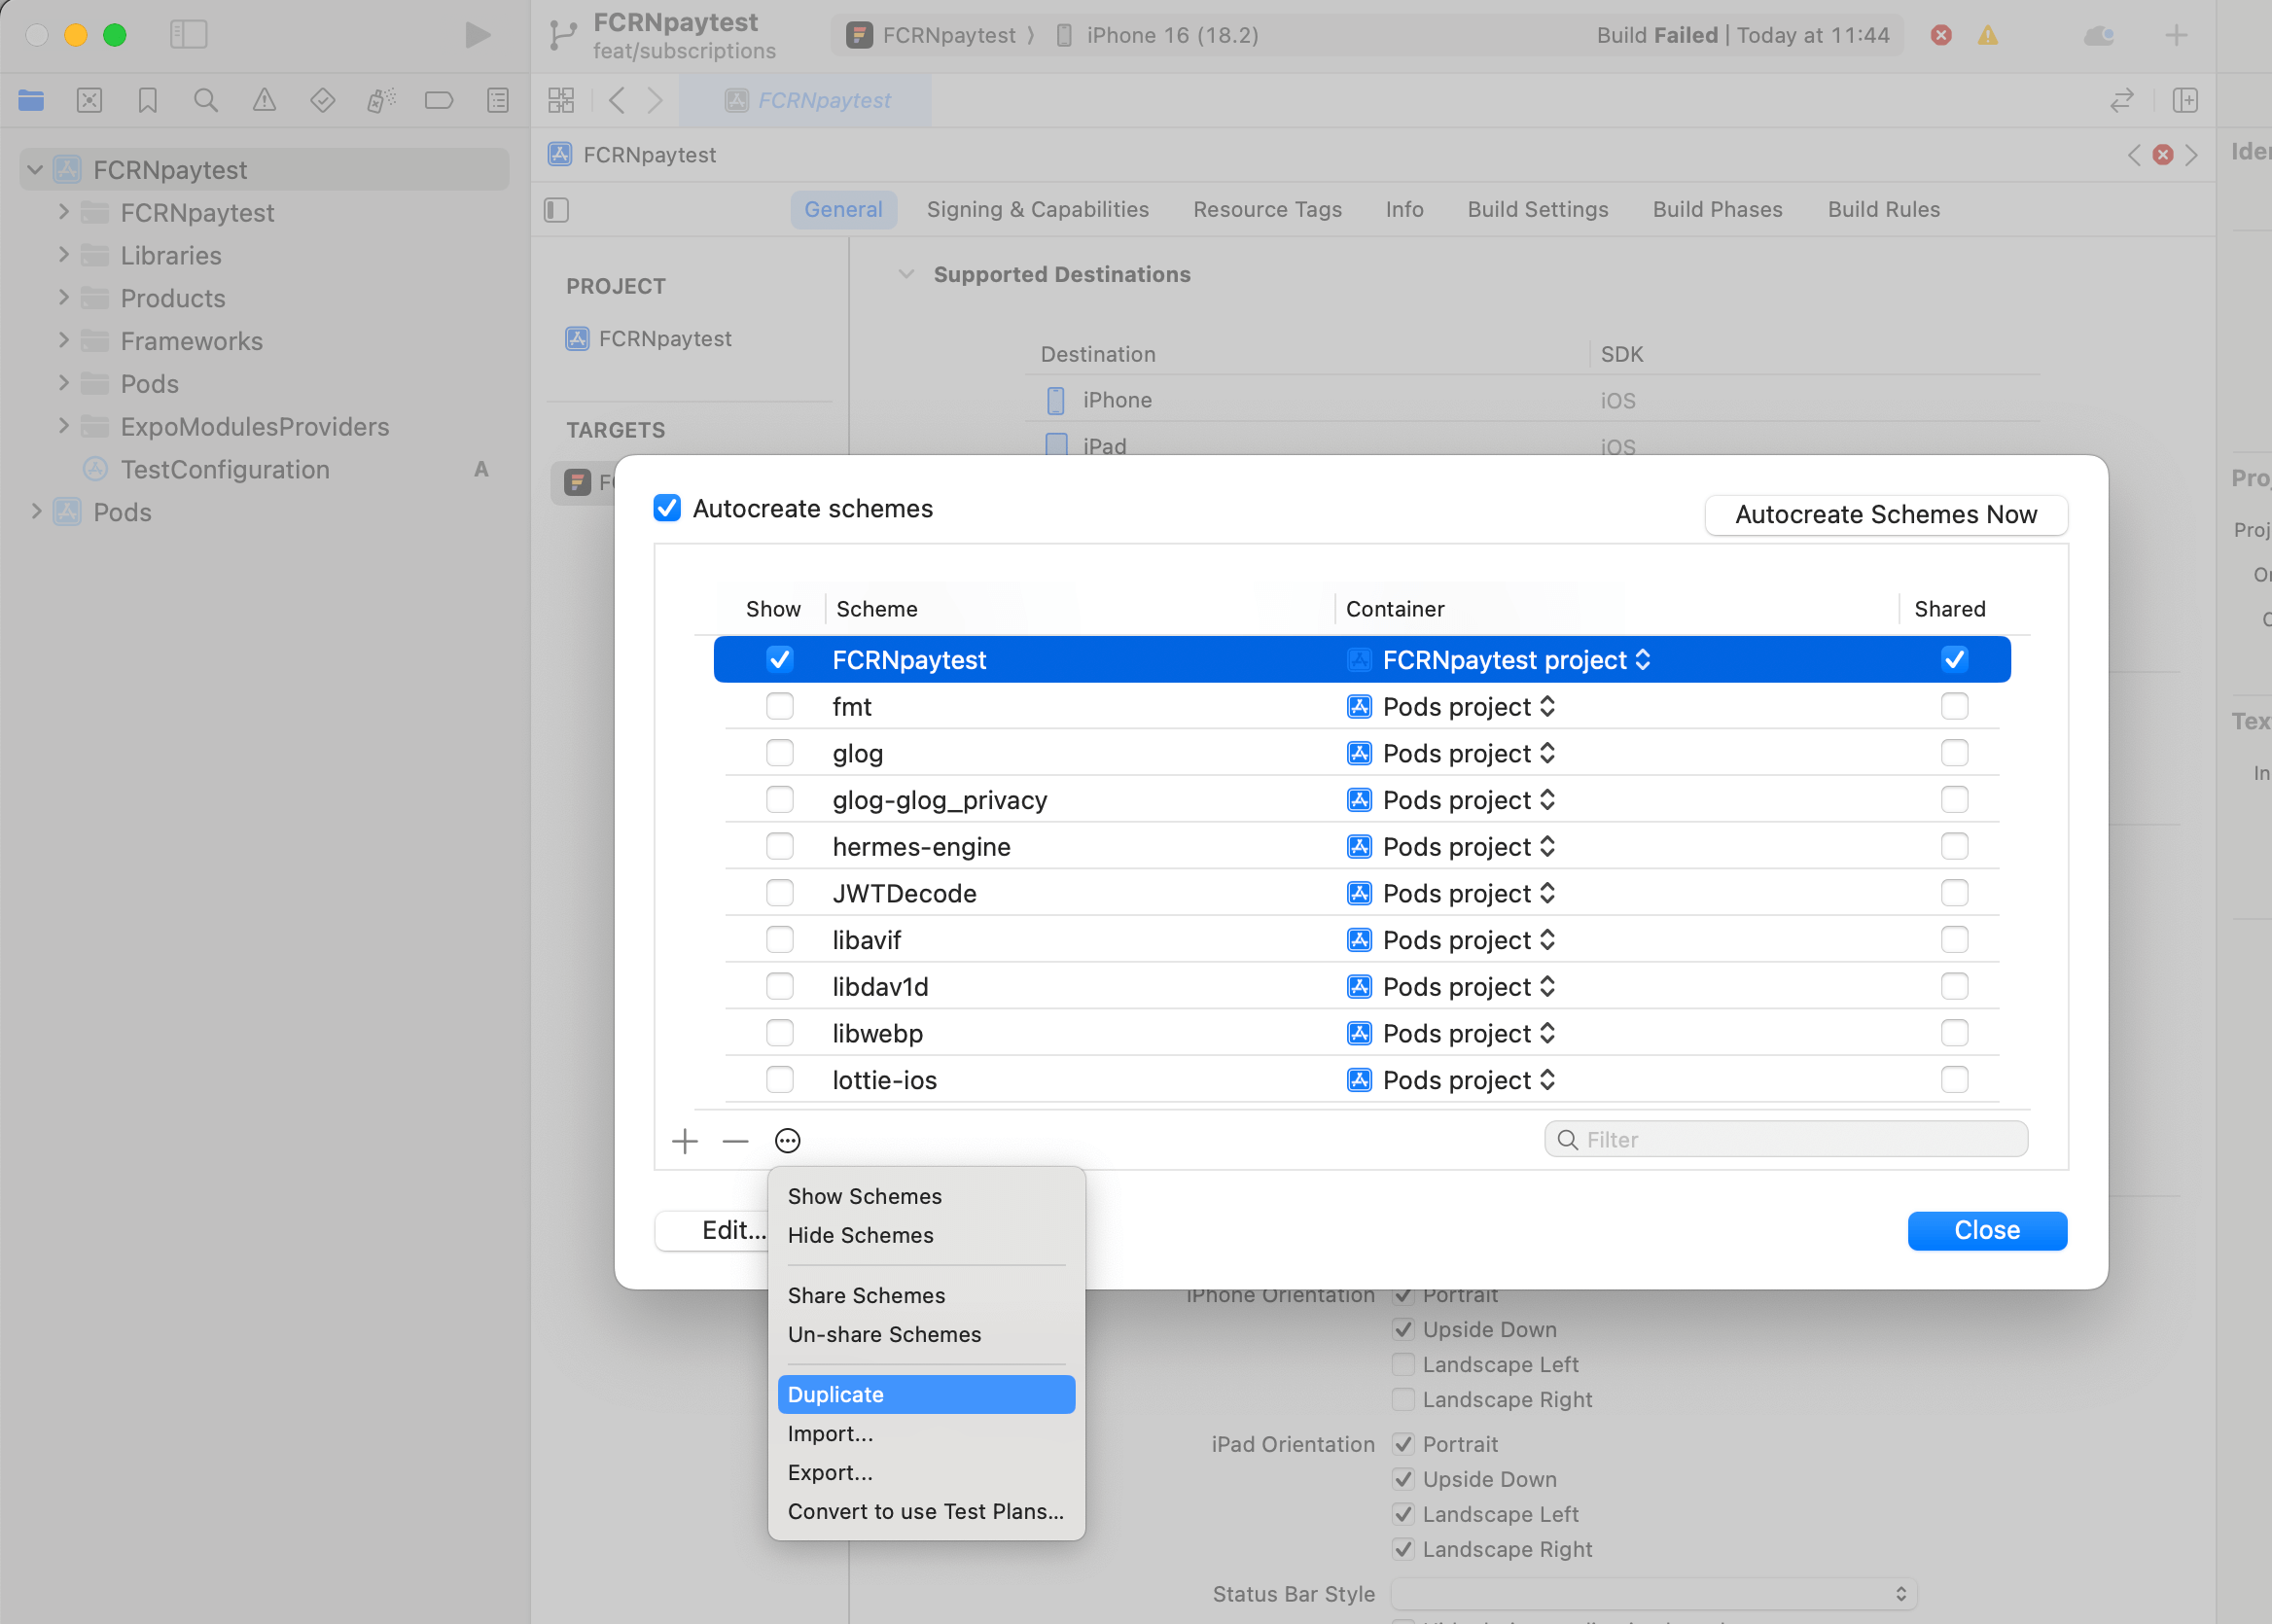
- Go to Product > Scheme > Manage Schemes
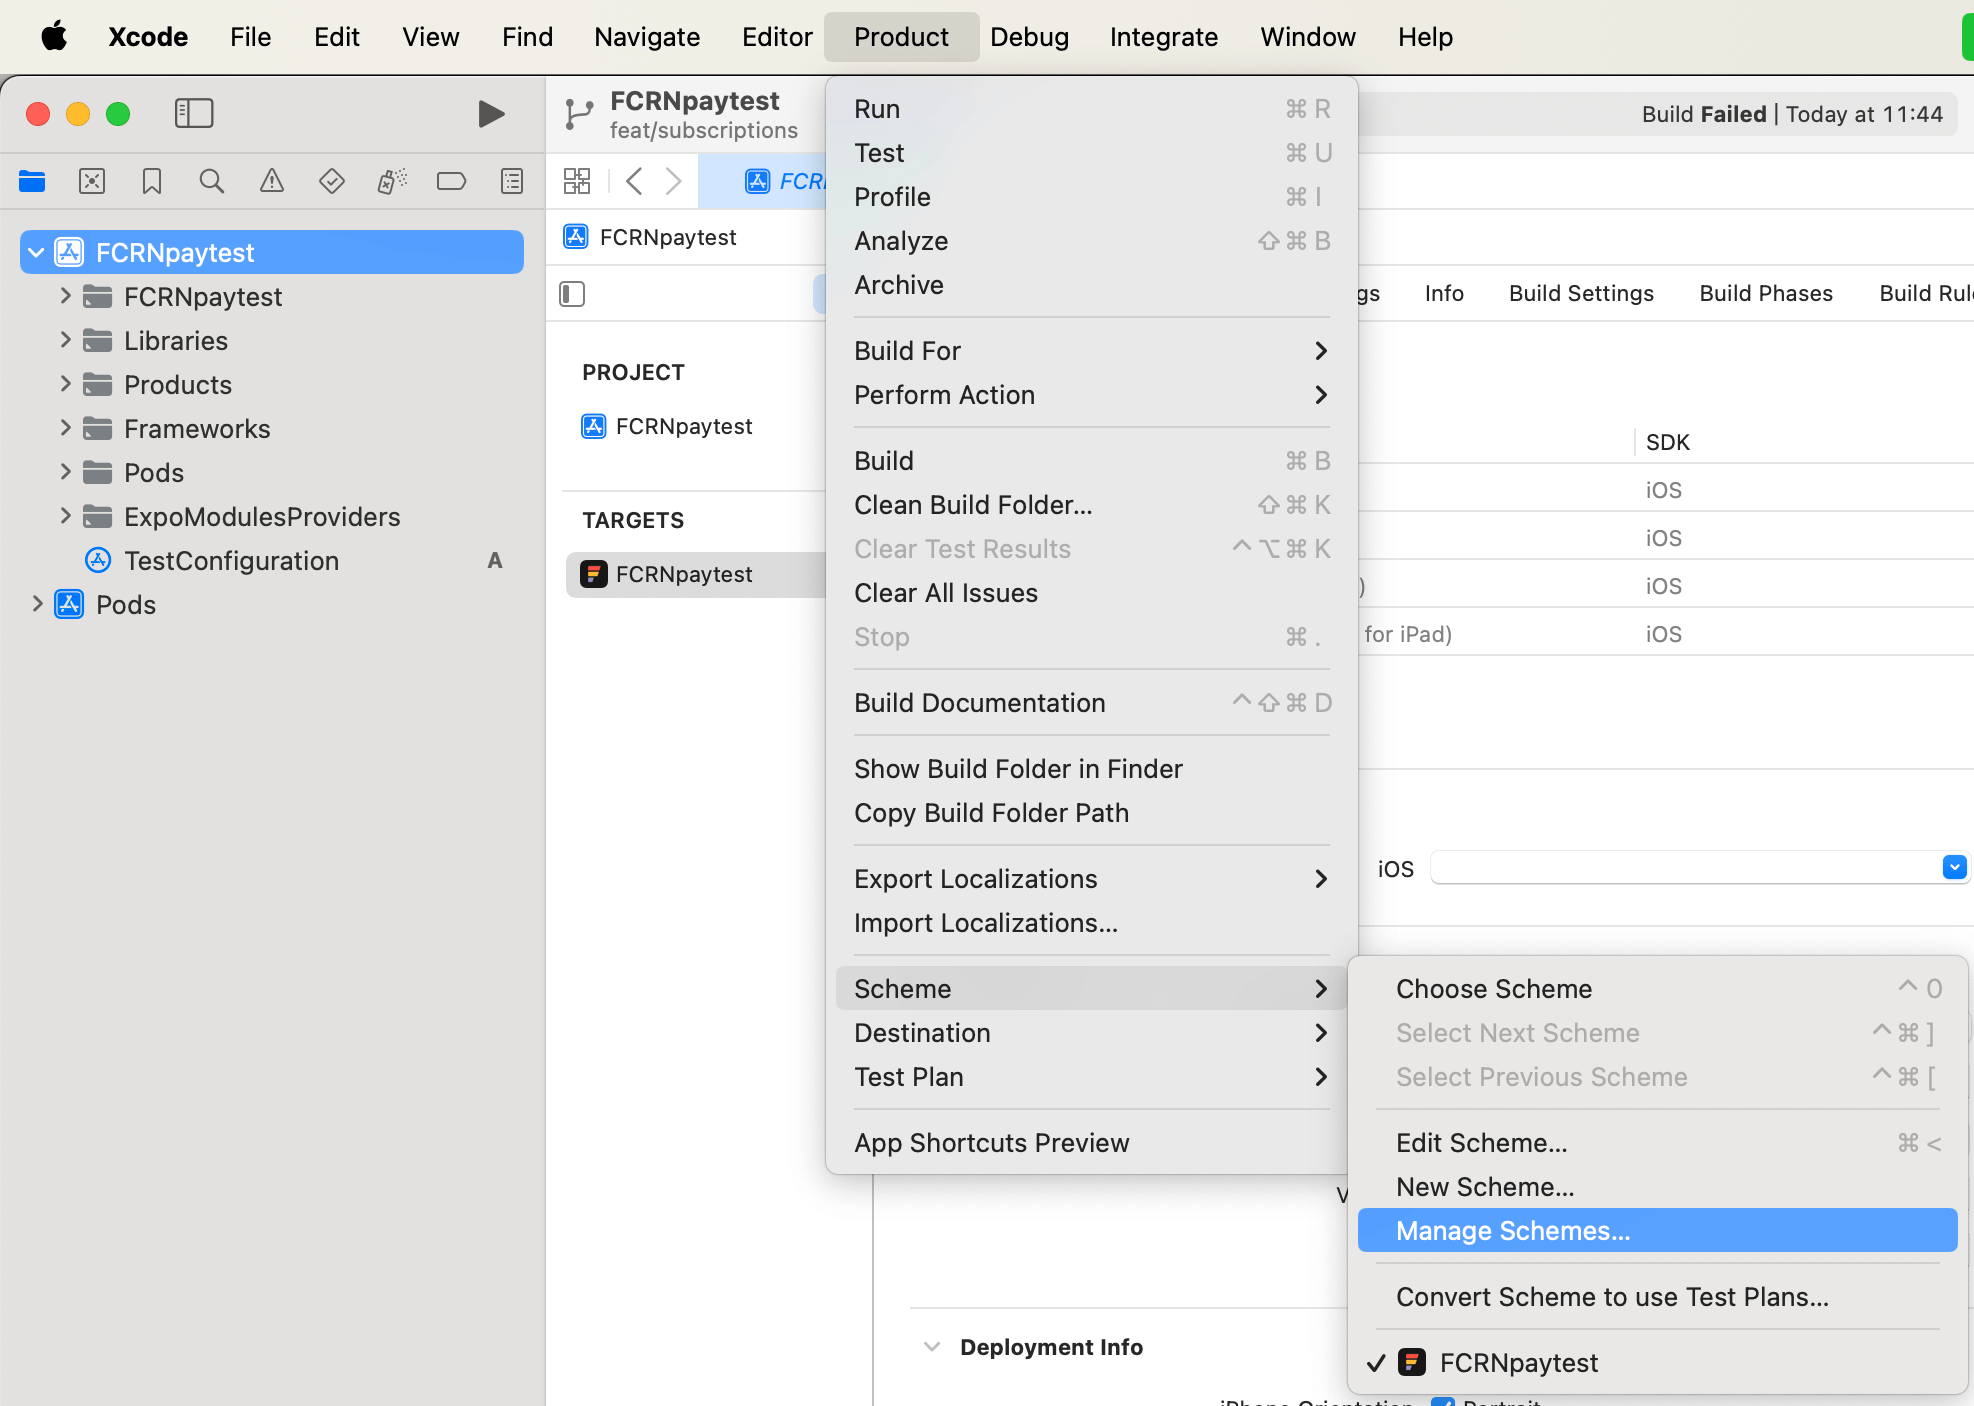
- Find your project name in the list, make sure it is highlighted by clicking on it, and then open the menu and select “duplicate”
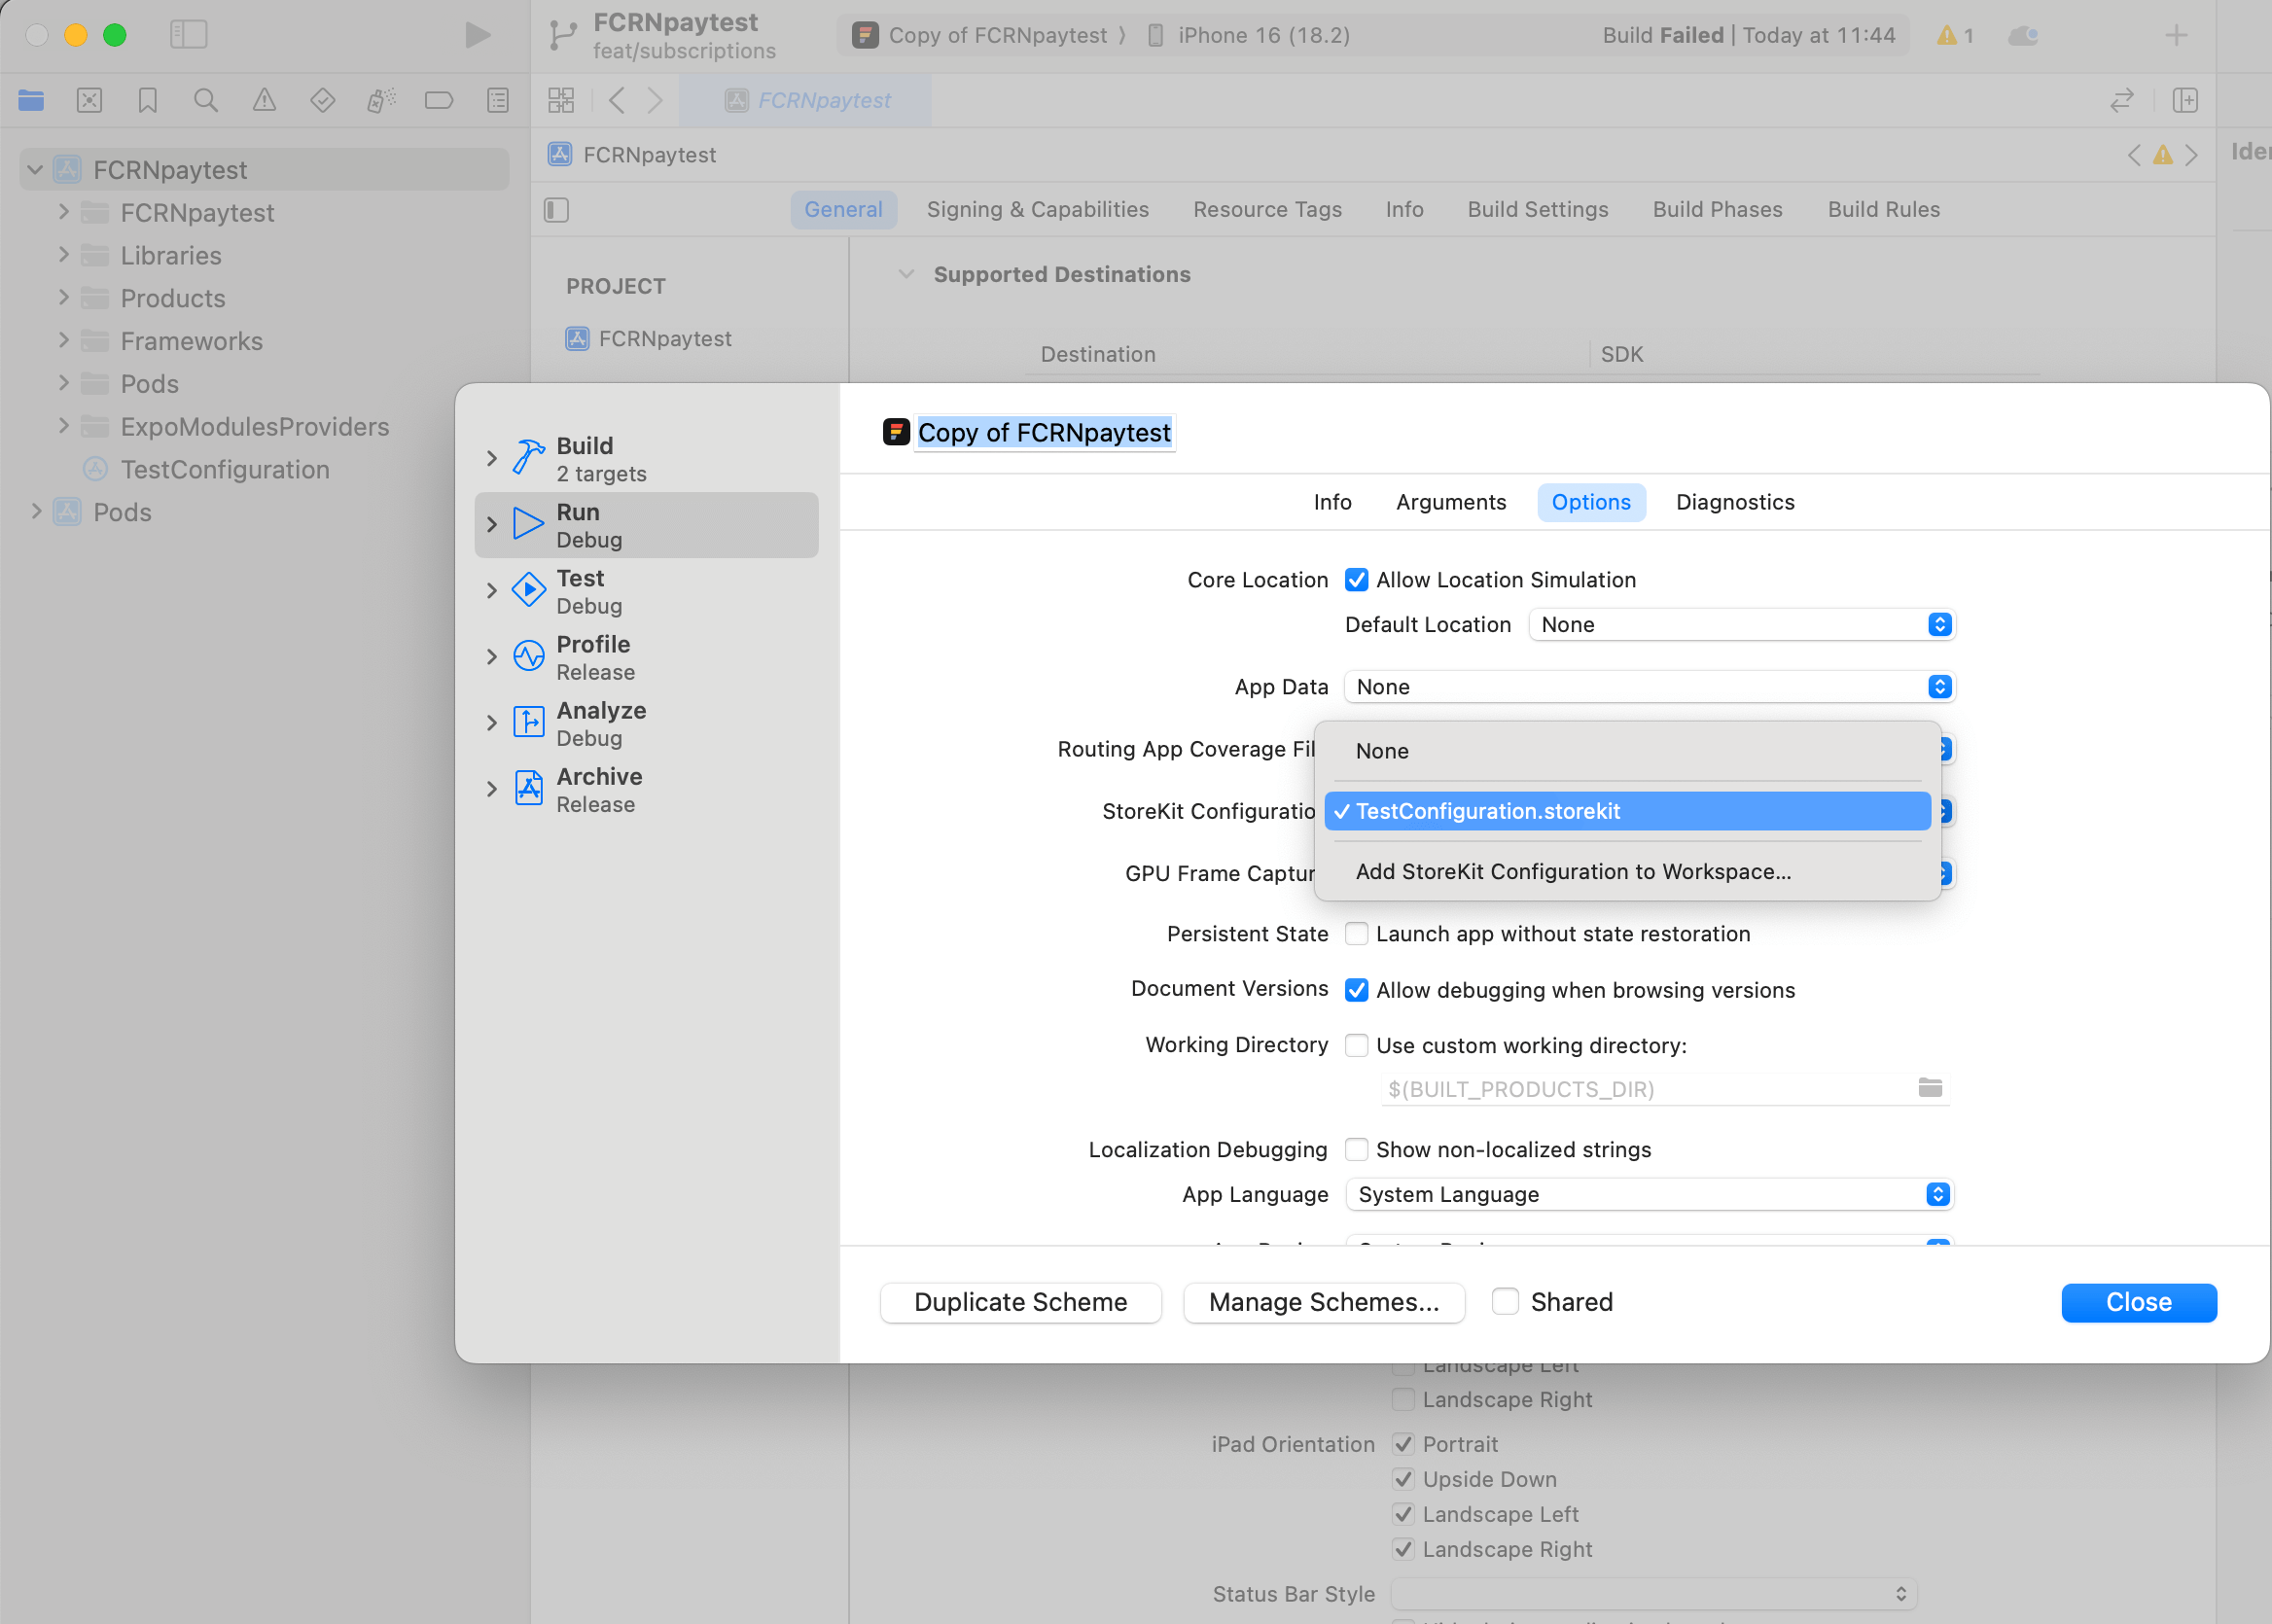
- Pick the StoreKit test configuration you just added
- You can now close the “manage schemes” menus.
- Go to Product > Scheme > Manage Schemes
- Upload your StoreKit configuration to RevenueCat
Starting the simulator from XCode
You need to start your build from XCode to use the StoreKit test configuration you created.
- Select a simulator as your target, and build your app using XCode by pressing the play button in the top left.
- When your build succeeds, it will start the simulator.
- Start your Expo development server: You might not see your app right away if your Expo dev server was not running. Run
npm startornpx expo start --dev-clientand select localhost:8081 in your simulator.
After deleting my
ios/directory I ran into a problem where my app would not build in XCode. Runningnpm run iosornpx expo run:iosafter did start the project in the simulator.
Deleting your test subscription
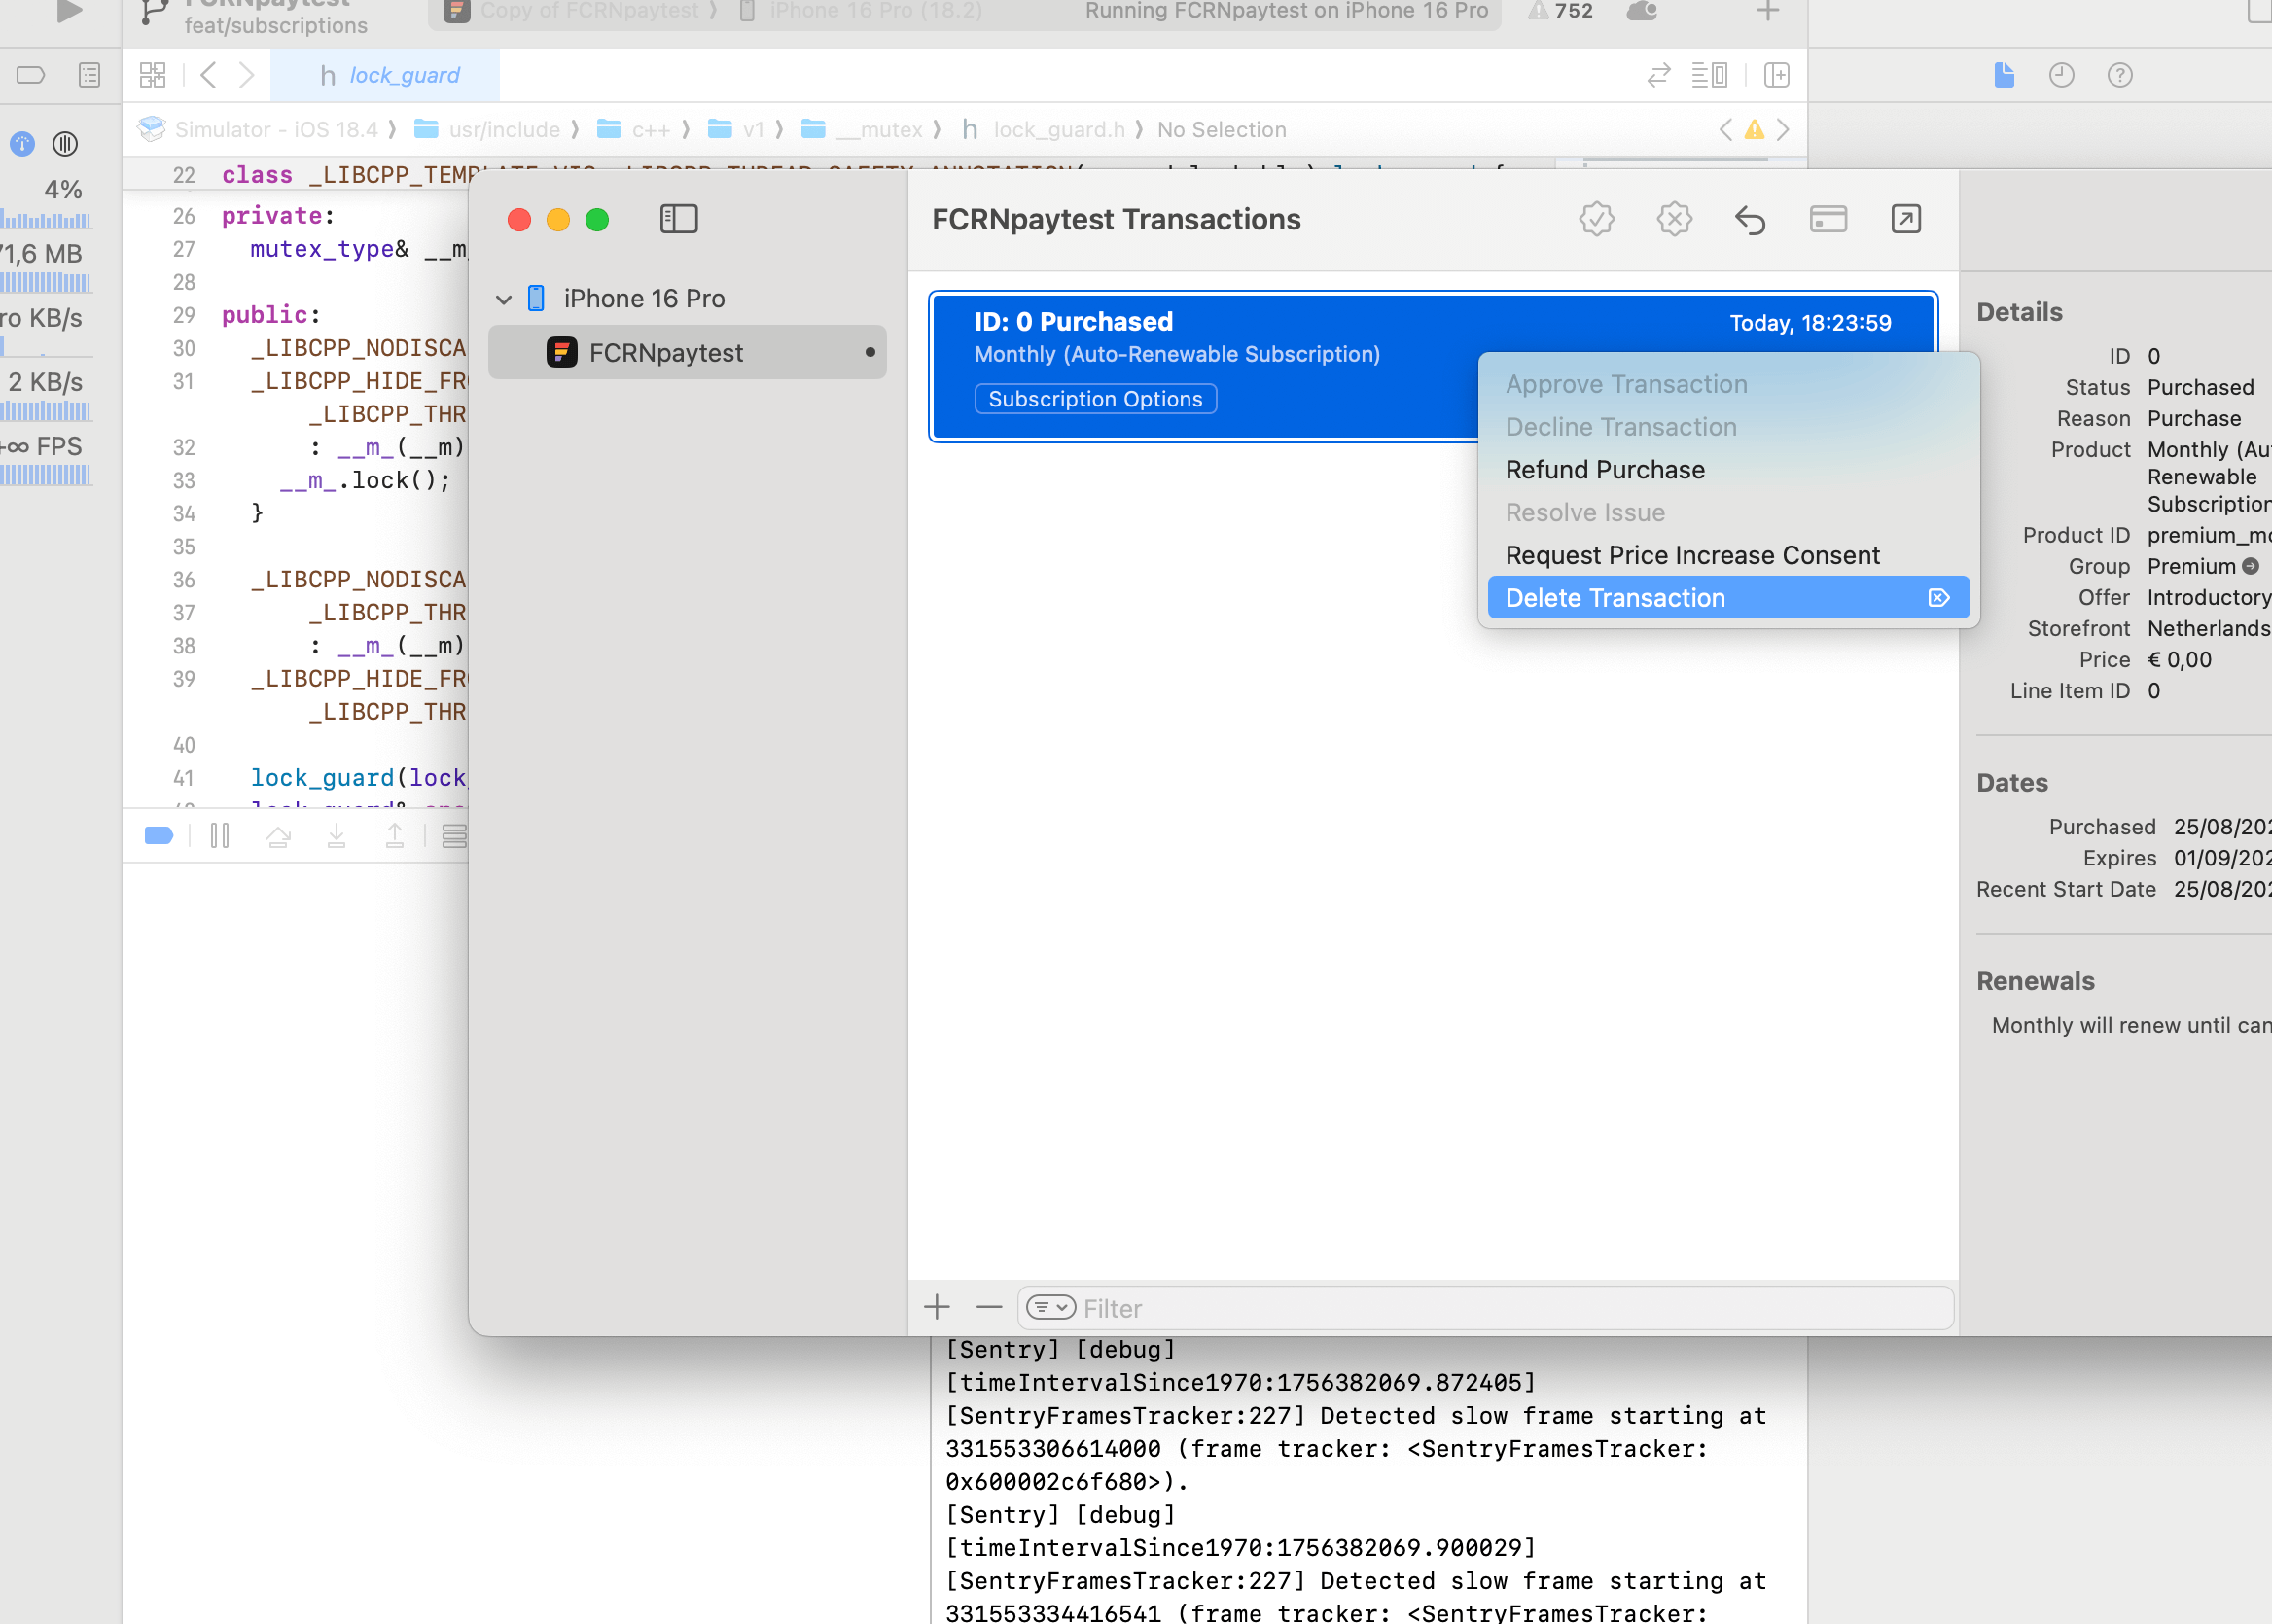
You can go into Xcode, and from the topbar select Debug > StoreKit > Manage Transactions. Here you can delete the subscription. This does not trigger any webhooks on RevenueCat’s end, so you might have to update your user’s subscription data in your database.
Conclusion
Testing subscriptions from an iOS simulator isn’t necessarily hard, but there is a lot of configuration and searching through menus in XCode involved. Hopefully this article makes it more straightforward.
