The implementation of Apple Pay itself isn’t very complicated. The biggest challenge is to get it to work in a development environment. In this article, I’ll show you how to test Apple Pay for web.
What is Apple Pay?
Apple Pay is a payment method that allows you to pay for goods and services with your Apple device. It’s a very secure way of paying, as it uses Touch ID or Face ID to verify your identity. It’s also very convenient, as you don’t have to enter your credit card details every time you want to make a purchase.
What do you need to test Apple Pay for your website?
To test Apple Pay for your website you need:
- An Apple device (iPhone, iPad, Mac)
- A new “Sandbox Tester” Apple ID from App Store Connect
- You can find the exact steps to create this new Apple ID here on Apple’s website
- The Apple ID needs to be associated with an environment that has an Apple Pay merchant ID
- You need to set the account’s region to a country that is allowed to test Apple Pay (e.g. the US)
- A tunneling service like ngrok or an alternative that supports having a stable HTTPS URL
- If you are using a mock API, you’ll also need to set up a stable URL (not random) for that using your tunneling service so that you can configure it in your Apple account with a Merchant ID
- Safari browser on your Apple device
You could connect an iPhone to your Macbook, but when using a Macbook you can use the built-in developer tools of Safari. This makes it a lot easier to test and debug your Apple Pay implementation.
Creating a second user on your Mac
Unless you are willing to sign out your Apple ID from your normal Mac user, you will need to create a second user on your Mac. This is because you can only have one Apple ID signed in at a time. If you want to test Apple Pay for your website, you will need to sign in with your “Sandbox Tester” Apple ID.
But that means having to set up an entire development environment again. After some searching, I found a way to create a second user on your Mac without having to set up a new development environment manually. This is how you do it:
- Open the Terminal app
- Run
sudo mkdir /users/newshortname(replacenewshortnamewith the shortname of the new user) - Run
sudo ditto ~ /users/newshortname. This will copy all the files from your current user to the new user. - From your current user, go to System Preferences > Users & Groups
- Click the lock icon in the bottom left corner to unlock the settings
- Click the ”+” button to add a new user
- Fill in the details of the new user
- Click “Create User”
- You will be prompted to use the existing home directory. This is the one you just created in step 3.
- Log out of your current user and log in with the new user
- Open your terminal and navigate to your home directory
- Run
sudo chown -R $(whoami) .to change ownership of the home directory via the terminal. This is necessary because the ownership of the home directory is still the same as your old user.
Now we can add one of the testing credit cards to our new user. This is how you do it:
- Go to System Preferences > Apple ID
- Log in with your “Sandbox Tester” Apple ID
- Go to Apple’s sandbox testing page and copy one of the testing credit cards
- Go to System Preferences > Wallet & Apple Pay
- Add the testing credit card to your Apple Pay wallet
If this all worked without errors, you should now be able to test your Apple Pay implementation. If you are getting an error when adding the test credit card, you might need to double-check your Apple ID’s region. It needs to be set to a country that is allowed to test Apple Pay (e.g. the US).
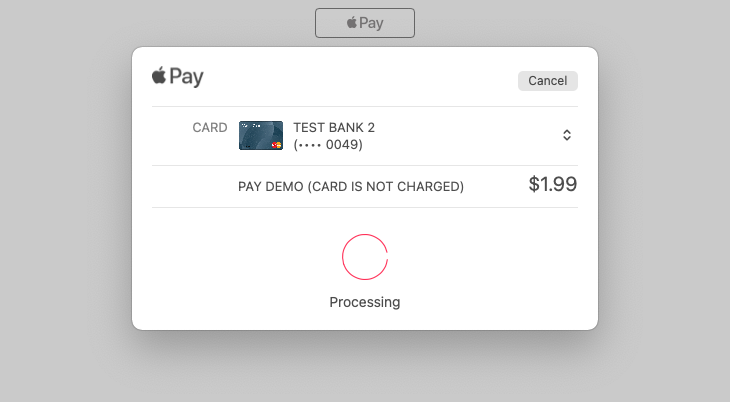
Start your development servers and start your tunneling service for your website and your mock API if you have one. Then open Safari on your Apple device and navigate to your website. You should now be able to test Apple Pay for your website.
Conclusion
Testing Apple Pay for your website can be a bit of a hassle. But once you have everything set up, it’s actually not that complicated. I hope this article helped you to get started with testing Apple Pay for your website.